


Hey there! I'm a supplier of Multistage Cylinders, and today I'm gonna walk you through the process of installing a multistage cylinder. Whether you're a DIY enthusiast or a professional mechanic, this guide will help you get the job done right.
Understanding Multistage Cylinders
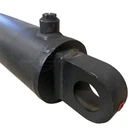
Before we dive into the installation process, let's quickly go over what multistage cylinders are. Multistage cylinders, also known as telescopic cylinders, are hydraulic cylinders that consist of multiple stages or nested tubes. These cylinders are designed to provide a long stroke in a compact package, making them ideal for applications where space is limited.
There are different types of multistage cylinders available, such as Replacement Telescopic Cylinders and Single Acting Telescopic Cylinders. Each type has its own unique features and applications, so it's important to choose the right one for your specific needs.


Tools and Materials You'll Need
To install a multistage cylinder, you'll need the following tools and materials:
- Wrenches and sockets
- Hydraulic fluid
- Seal kit (if necessary)
- Safety glasses
- Gloves
- A clean work area
Step 1: Prepare the Work Area
First things first, you need to prepare a clean and safe work area. Make sure the area is well-lit and free from any debris or obstacles. Lay down a clean cloth or mat to protect the cylinder and prevent any dirt or contaminants from getting into the hydraulic system.
Step 2: Remove the Old Cylinder (if applicable)
If you're replacing an old cylinder, you'll need to remove it first. Start by disconnecting the hydraulic hoses from the cylinder. Use a wrench to loosen the fittings and carefully remove the hoses. Be sure to catch any hydraulic fluid that may spill out.
Next, remove any mounting bolts or brackets that are holding the cylinder in place. Depending on the application, the cylinder may be mounted with bolts, pins, or other fasteners. Use the appropriate tools to remove these fasteners and carefully lift the old cylinder out of the machine.
Step 3: Inspect the New Cylinder
Before installing the new cylinder, it's important to inspect it for any damage or defects. Check the cylinder for any signs of leaks, dents, or scratches. Make sure the seals are in good condition and that the cylinder is the correct size and type for your application.
If you notice any damage or defects, contact your supplier immediately to get a replacement. Using a damaged cylinder can lead to serious safety issues and may cause damage to your equipment.
Step 4: Install the New Cylinder
Once you've inspected the new cylinder and ensured that it's in good condition, it's time to install it. Start by positioning the cylinder in the mounting location. Make sure the cylinder is aligned correctly and that the mounting holes match up with the holes in the machine.
Insert the mounting bolts or brackets and tighten them securely. Use a torque wrench to ensure that the bolts are tightened to the correct specifications. Over-tightening the bolts can damage the cylinder or the mounting surface, while under-tightening can cause the cylinder to loosen and leak.
Step 5: Connect the Hydraulic Hoses
After the cylinder is installed, it's time to connect the hydraulic hoses. Start by cleaning the ends of the hoses and the fittings on the cylinder. Use a clean cloth to remove any dirt or debris.
Apply a small amount of hydraulic fluid to the seals on the fittings to lubricate them. Then, carefully insert the hoses into the fittings and tighten them using a wrench. Make sure the hoses are tightened securely, but be careful not to over-tighten them.
Step 6: Fill the Hydraulic System
Once the hoses are connected, it's time to fill the hydraulic system with fluid. Check the manufacturer's specifications for the correct type and amount of hydraulic fluid to use. Use a funnel to pour the fluid into the reservoir slowly.
As you fill the reservoir, keep an eye on the level gauge to make sure you don't overfill it. Once the reservoir is filled to the correct level, start the machine and operate the cylinder a few times to bleed any air out of the system.
Step 7: Test the Cylinder
After the hydraulic system is filled and the air is bled out, it's time to test the cylinder. Start the machine and slowly extend and retract the cylinder a few times. Check for any leaks or abnormal noises. If you notice any problems, stop the machine immediately and inspect the cylinder and the hydraulic system.
If the cylinder operates smoothly and there are no leaks or abnormal noises, you can continue to use the machine as normal. However, it's a good idea to monitor the cylinder closely for the first few hours of operation to make sure everything is working properly.
Step 8: Maintenance and Care
Once the cylinder is installed and tested, it's important to maintain and care for it properly. Regular maintenance can help extend the life of the cylinder and prevent costly repairs.
Here are some tips for maintaining and caring for your multistage cylinder:
- Check the hydraulic fluid level regularly and top it off as needed.
- Inspect the seals and hoses for any signs of wear or damage. Replace them if necessary.
- Keep the cylinder clean and free from dirt and debris.
- Follow the manufacturer's recommended maintenance schedule for your specific cylinder.
Conclusion
Installing a multistage cylinder may seem like a daunting task, but with the right tools, materials, and knowledge, it can be done safely and easily. By following the steps outlined in this guide, you can install a multistage cylinder like a pro and ensure that your equipment operates smoothly and efficiently.
If you have any questions or need further assistance with installing a multistage cylinder, don't hesitate to contact us. We're a leading supplier of Multistage Cylinders and have years of experience in the industry. We can help you choose the right cylinder for your application and provide you with the support and guidance you need to get the job done right.
So, what are you waiting for? Contact us today to learn more about our multistage cylinders and how we can help you with your installation needs.
References
- Manufacturer's installation and maintenance manuals
- Hydraulic system design and troubleshooting guides