

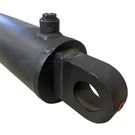



As a leading supplier of dump trailer hoists, I understand the importance of proper maintenance to ensure the optimal performance and longevity of your equipment. One crucial aspect of maintenance is changing the hydraulic fluid in your dump trailer hoist. In this blog post, I'll guide you through the process step by step, providing valuable insights and tips along the way.
Why Change the Hydraulic Fluid?
Hydraulic fluid serves as the lifeblood of your dump trailer hoist, transferring power and lubricating moving parts. Over time, however, the fluid can become contaminated with dirt, debris, and moisture, which can lead to reduced performance, increased wear and tear, and even system failure. By regularly changing the hydraulic fluid, you can prevent these issues and keep your hoist running smoothly.
When to Change the Hydraulic Fluid
The frequency of hydraulic fluid changes depends on several factors, including the type of hoist, the operating conditions, and the manufacturer's recommendations. As a general rule of thumb, it's recommended to change the hydraulic fluid every 1,000 to 1,500 hours of operation or at least once a year, whichever comes first. However, if you operate your dump trailer hoist in harsh conditions, such as extreme temperatures or dusty environments, you may need to change the fluid more frequently.
Tools and Materials You'll Need
Before you begin changing the hydraulic fluid in your dump trailer hoist, gather the following tools and materials:
- Hydraulic fluid (check your hoist's manual for the recommended type and quantity)
- Fluid drain pan
- Socket wrench set
- Filter wrench
- Funnel
- Clean rags or towels
Step-by-Step Guide to Changing the Hydraulic Fluid
Now that you have everything you need, let's get started with the process of changing the hydraulic fluid in your dump trailer hoist:
Step 1: Prepare the Hoist
- Park the dump trailer on a level surface and engage the parking brake.
- Lower the dump body to its fully down position to relieve pressure from the hydraulic system.
- Turn off the engine and allow the hoist to cool down for at least 30 minutes to prevent burns.
Step 2: Locate the Fluid Reservoir and Drain Plug
- Refer to your hoist's manual to locate the hydraulic fluid reservoir and drain plug. The reservoir is typically a large metal or plastic tank located near the hoist pump.
- Place the fluid drain pan beneath the drain plug to catch the old fluid.
Step 3: Drain the Old Fluid
- Use a socket wrench to loosen the drain plug and allow the old fluid to drain into the pan. Be careful not to spill the fluid on the ground or your clothing.
- Once the fluid has finished draining, tighten the drain plug securely.
Step 4: Replace the Hydraulic Filter
- Locate the hydraulic filter, which is usually located near the fluid reservoir.
- Use a filter wrench to remove the old filter. Be sure to have a clean rag or towel handy to catch any remaining fluid that may drip from the filter housing.
- Install the new filter by hand-tightening it until it's snug. Do not over-tighten the filter, as this can damage the filter housing.
Step 5: Refill the Hydraulic Fluid
- Use a funnel to pour the new hydraulic fluid into the reservoir. Be careful not to overfill the reservoir, as this can cause the fluid to foam and reduce the efficiency of the hydraulic system.
- Check the fluid level in the reservoir using the dipstick or sight glass. The fluid level should be between the minimum and maximum marks on the dipstick or sight glass.
- If necessary, add more fluid to bring the level up to the appropriate mark.
Step 6: Bleed the Hydraulic System
- Start the engine and operate the hoist several times to bleed any air from the hydraulic system. This will ensure that the system is filled with fluid and functioning properly.
- Check the fluid level in the reservoir again and add more fluid if necessary.
Step 7: Test the Hoist
- Raise and lower the dump body several times to test the hoist's operation. Pay attention to any unusual noises or vibrations, as these may indicate a problem with the hydraulic system.
- If you notice any issues, stop using the hoist immediately and consult a professional mechanic or hydraulic technician.
Tips for Maintaining Your Dump Trailer Hoist
In addition to changing the hydraulic fluid regularly, there are several other steps you can take to maintain your dump trailer hoist and ensure its optimal performance:
- Keep the hoist clean and free of dirt, debris, and moisture.
- Inspect the hoist regularly for signs of wear and tear, such as leaks, cracks, or loose fittings.
- Lubricate the moving parts of the hoist, such as the pivot points and cylinders, according to the manufacturer's recommendations.
- Store the dump trailer in a dry, protected area when not in use to prevent rust and corrosion.
Conclusion
Changing the hydraulic fluid in your dump trailer hoist is a relatively simple process that can help prevent costly repairs and ensure the longevity of your equipment. By following the steps outlined in this blog post and maintaining your hoist regularly, you can keep your dump trailer hoist running smoothly for years to come.
If you're in the market for a new dump trailer hoist or replacement parts, we offer a wide range of high-quality products to meet your needs. Check out our Tipper Trailer Kits, Hydraulic Scissor Hoists, and Dump Bed Trucks Hoist for more information.
If you have any questions or need further assistance, please don't hesitate to contact us. We're here to help you find the right dump trailer hoist for your application and provide you with the support and service you need to keep it running smoothly.


References
- Manufacturer's manuals for dump trailer hoists
- Industry best practices for hydraulic system maintenance